Well, it has been a very pleasant semain down here in La Sud de France. Pleasant as in sun, windy, warm and welcoming . We wish you were all here to share this beautiful situation with us.
Stairs
Stairs here come in kits. I searched all over the brico
places for regular stair stringers to custom make our stairs to the terrasse
from the garage but ended up with a kit instead.


It seemed you need about five people to hold what you had just completed while others were moving on down. We finally used long clamps to hold it together until the glue in the slots had set. At 3 foot spacing, along screw was driven in, but you couldn’t do that until all was properly fitted. It only took about 5 hours. Pat had pre-stained and added a coat of clear so they looked very nice finished.
Last panel
 The old house had
wainscoting throughout the street level. Due to the rising damp problem,
several of the panels required extensive repairs. Wood rot and wood worm made
the remaining panels very fragile. Because of the modifications and rebuilding
of the walls, all the dimensions were not the same as the original panel
length.
The old house had
wainscoting throughout the street level. Due to the rising damp problem,
several of the panels required extensive repairs. Wood rot and wood worm made
the remaining panels very fragile. Because of the modifications and rebuilding
of the walls, all the dimensions were not the same as the original panel
length.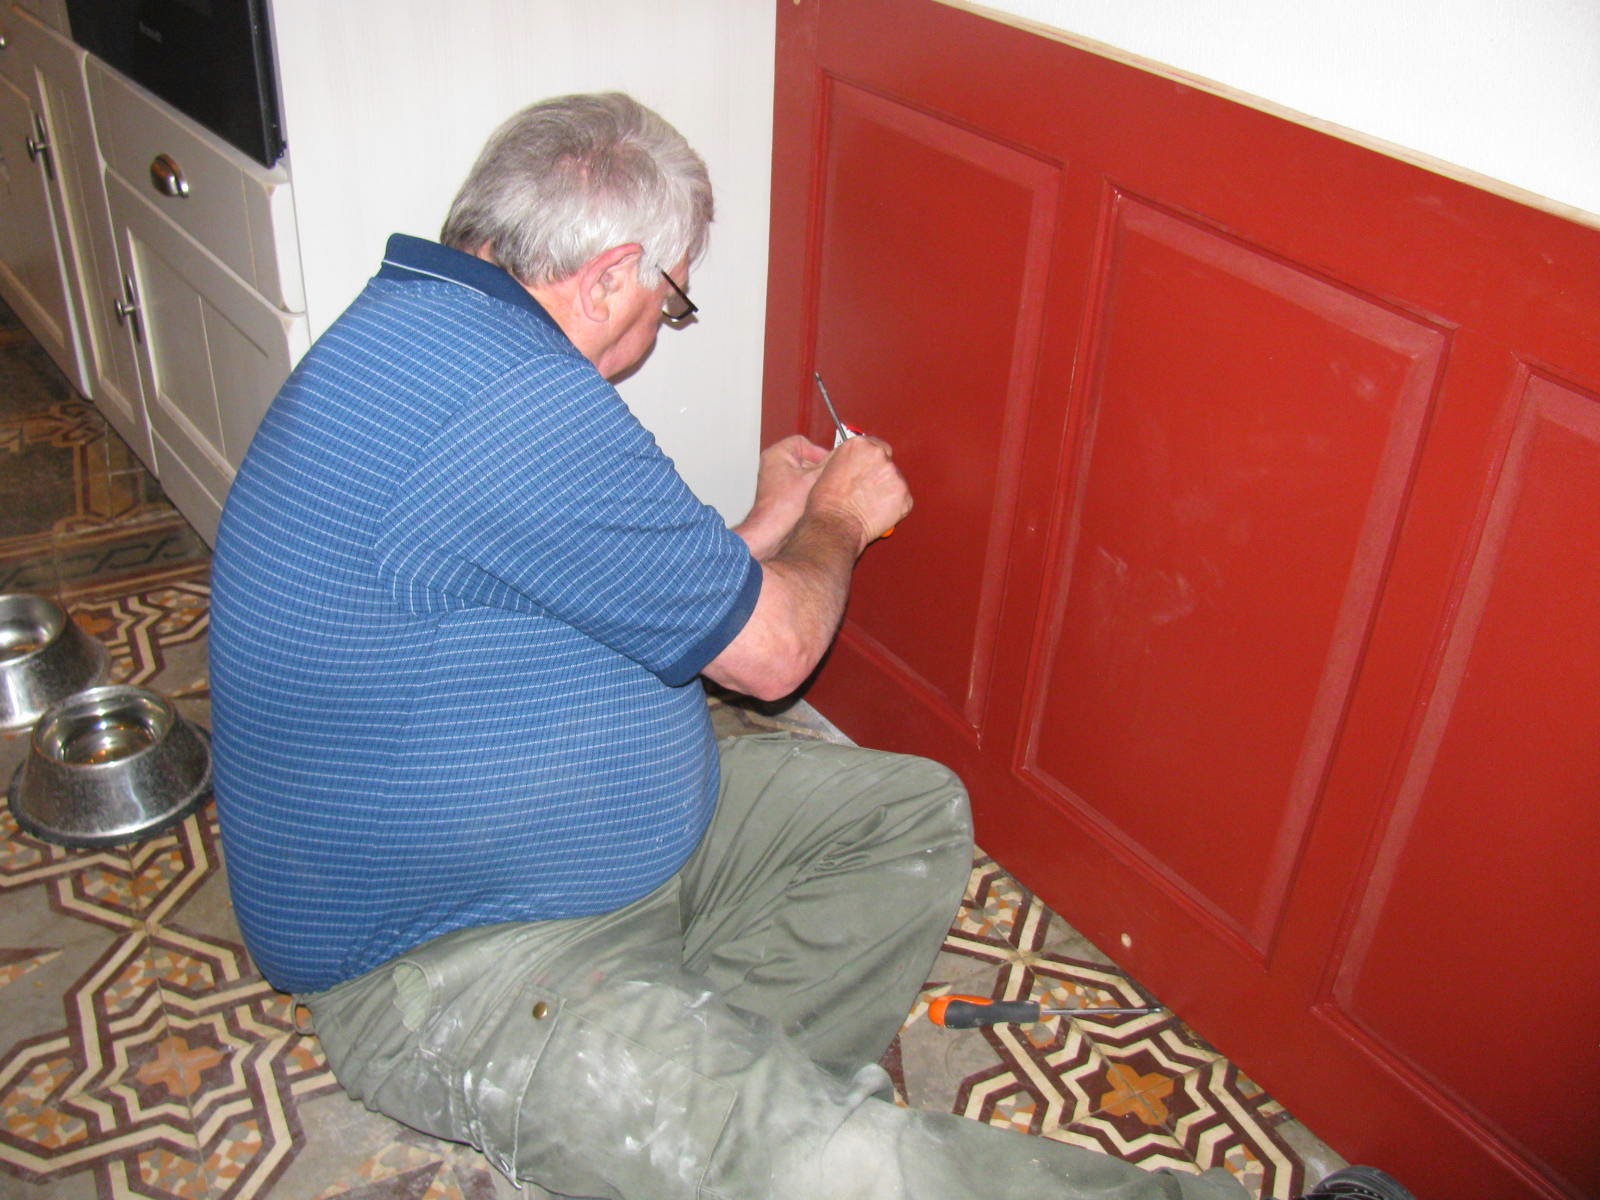
Most of the panels were adapted to new locations. This panel was totally built from scratch to fill the remaining wall in the kitchen. The panel was square but the walls are not straight so it is difficult to scribe them to the walls. (Which I did not do on this one.)
Toilet in garage
Pat had previously showed the finished toilet in the garage
but here is how it started. Working with the steel framing is quite a change
from wood studs.


Threshold
I tried for several hours on different attempts to repair a
threshold to the terrasse area. I tried to cut and fit wood to rebuild an old
wood threshold complete with a drip ledge to shed any rain or water. Then in a
stroke of genius (or blind luck) I decided to try my hand with a concrete
product for the first time on detail work. I previously had only poured simple slabs and while not particularly proud of this work, it is totally in keeping with an old house.


Terrasse walls cleaning and prep


 |
| Before and after |
Except for the very high places, it was reasonable easy too remove decades and decades of dust, spider webs and lint. I am sure the walls had never been cleaned sinced they were rendered. the lower walls had a concrete lime render but above 3 meters on one wall ther was nothing except the brickes used to build the wall on our third level. it made quite an unusal pattern and we may leave it for interest or paint it the same as the other walls.
Balcony grille
In the fall, we had found a suitable "corps gard" (window grille) for the barn window. we finally coerced David to come and install it for us in March. We had de-rusted and painted it last fall and thought it would be a fitting addition to the old ruin. Benjamin and Jeremy parked the camion in the main road and set up their scaffolding and started drilling. They had to use my mortar buster since they hit a hard rock in the wall. After the holes were suitably large, they filled them with chemique, a chemical bonding agent used here that grabs the concrete and whatever else is in the whole and sets up incredibly strong in about 20 minutes.


in about an hour, they finished with a promise to come back demain to put mortar in the holes. Benjamin was right on time and again thought nothing of blocking traffic while he mortared up the holes.
Floors
 |
| the clean and the unclean |
In the salon, (or TV room) Pat worked for about a month on the terracotta floors. They were filthy with years and years of abuse, dirt and debris from the barn and from the renters who never cleaned anything. Because the floor could be cleaned only by sitting on the floor and working on one tile at a time it was uncomfortable work that allowed for only a few tiles at a time be cleaned. I lost track of how much decapant she used but I considered buying stock in the mother company to regain some of the expense thru dividends. Pat also used more razor blades and scrubbers than I thought could be found in France. The dirty floor finally started to become recognizable as pale peach/sand colored tiles. After scrubbing and scrapping and mopping for almost a month, Pat finally hooked up her floor polisher and used the scrubbers on that machine to get the last bit of gunk off the floor. The artisan who cleaned the kitchen floors looked at the job Pat did and said that was as good as the floor would be. The only thing they would do to make it better was to apply a coat of resin. Since that was expensive and the floor was to have a rug we declined. One of the things the artisan pointed out on the tiles was what looked like a very small kitten paw print. He said it was the "mark of the savage" and the man that made the tile marked his tiles that way. So I guess with a stretch of imagination you could say we have a signed work of art for a floor in the salon.
 St. Adrian's Garden

 As mentioned in the last post, we went to St.Adrian's last Sunday for a really pleasant afternoon. This apparently is virtually all French as I did not detect any tourists or expats in the crowd. It was a very lazy affair where strolling and sitting in the bright sunshine was a delight.There was music by an Italian tenor who was quite pleased with his own voice and it rang through. The horse show was a bit tame with mostly prancing horses and riders accompanied on occasion by a formally dressed couple dancing. One pony was very spirited and stylish but he got into trouble when his prancing splashed water on the boss. The Carnival costumes were extraordinarily brilliant and the actor posed for thousands of photos.


